
During the 2011 Apple Season a good friend of ours, Cory of Friends in Photography, made multiple trips out to our orchard to take pictures for a photo story of the orchard. Over the next few weeks I’m going to give you glimpses as some of these pictures and hopefully help ‘tell you the story’ of how things are done around the orchard.
 Step 1: Set up.
We pre-heat the caramel in an insulated box that Jared created that utilizes the same hot water we use to heat our house from our wood stove. It works so well and saves us a lot of timing heating the caramel to the perfect temperature. Before we start making the caramel apples we get everything all set up so our process runs as smoothly as possible. We don’t start caramel apple-ing typically until our girls are in bed…but as you can see – Pip wasn’t quite as cooperative as the older two. So we set up the apples – stems up for Jared (or whomever) to poke the sticks into, caramel simmering, commercial size baking sheets out and sprayed (we use two), nuts out, and empty trays ready. 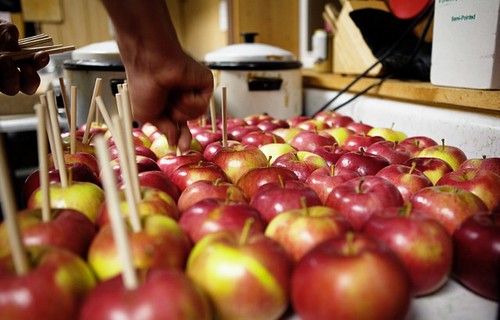 Step 2: Sticking
Jared can put the sticks in with his bare hands but most of us need something between the stick and our palm like a brace or wrist guard.  Step 3: Dipping
Once everything’s set up, the apples are ‘stuck’ and the caramel is at the perfect temperature and consistency the dipping begins. Jared is by far the most efficient dipper in the family. He is constantly going and has the timing down perfectly. You did the number of caramel apples you think you can get through before it’s time to nut them. We put them on the first tray to cool and have the excess caramel drip off. 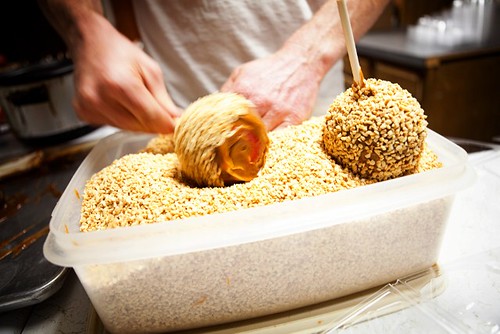 Step 4: Nutting & Plains
At the perfect time – when the caramel is cool – but not cool it’s time for nutting. If you do this step too soon you have a sticky mess. If you wait too long – it’s really hard to get the nuts to stick. When I do the apple dipping I can usually dip about 5 to 5 apples before I have to start nutting. Jared can do about 10 to 12 – much more efficient. You can also see that Jared is excellent at covering the ENTIRE apple with nuts!
The larger apples on the first tray go to the second tray for further cooling. These will be plain caramel apples. If we package them before they’ve cooled off the caramel tends to stick in the package instead of onto the apple. Our goal is to make the perfect caramel apple so you keep coming back – again and again, year after year to enjoy one of those delicious treats. 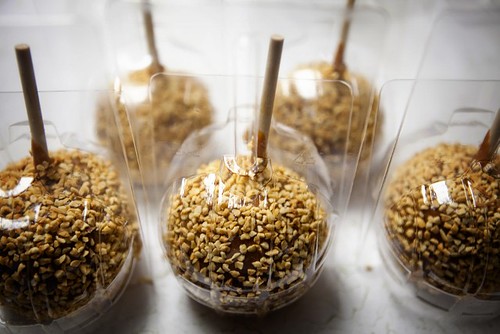 Step 5: Packaging
Once the caramel apples are nutted or cool enough we place them in the clam shells. These lay out flat and then snap together once the apple is placed. 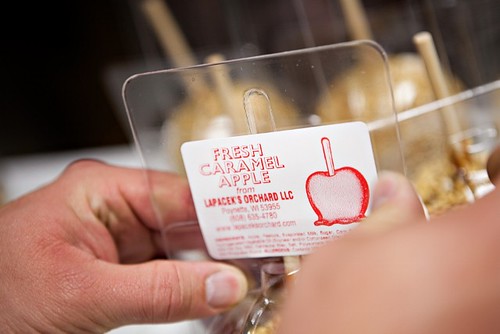 Step 6: Labeling
Next – we close our clam shells up with our label. This tells you what you’re buying, who made it (Lapacek’s Orchard LLC) and the ingredients that can be found in it. We used to staple all our packages shut but we’ve found this works much better and eliminates a step. 
Step 7: Eating and Enjoying
The final step to the process is to see our customers eating and enjoying their very own, delicious, huge caramel apple. They’re so good they even made the magazine ‘Splash’ as a local food favorite.
No comments:
Post a Comment